R Name Photo Frame Download
Hard to believe it, but Father's Day is right around the corner! Here in central PA, it felt like winter until just a few days ago (seriously, we had snow two weeks ago!)…so the month of June has completely snuck up on me. Where did May go?!?
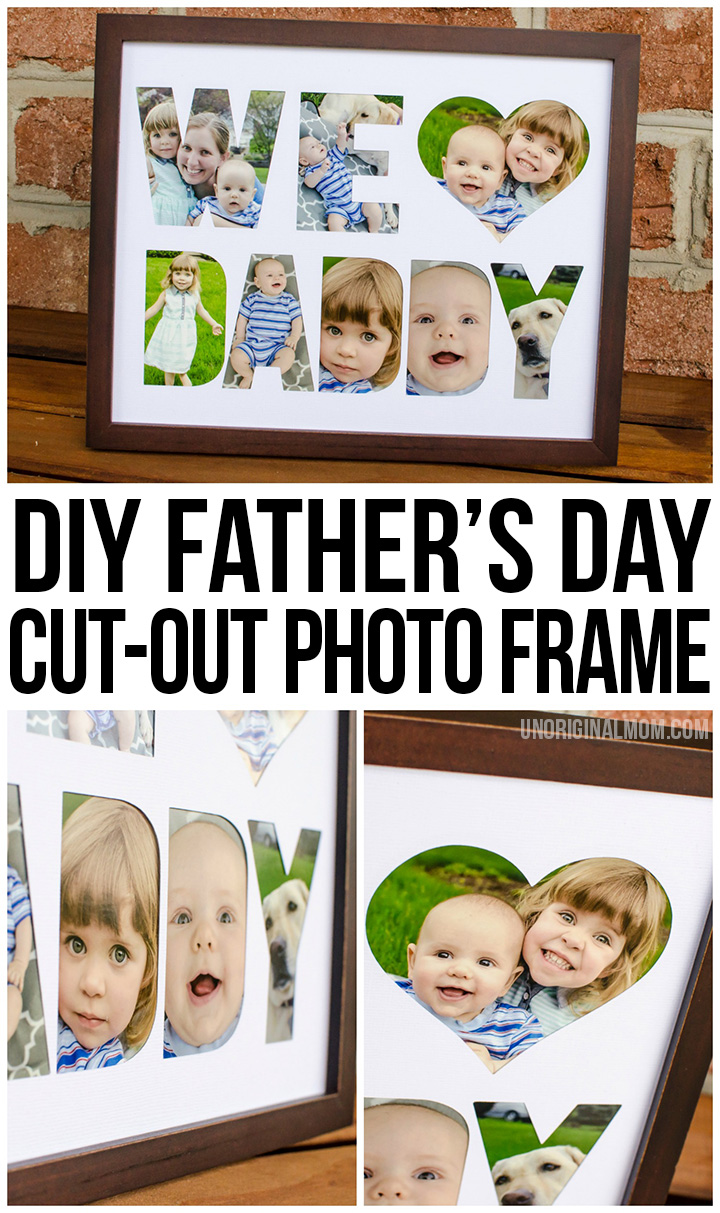
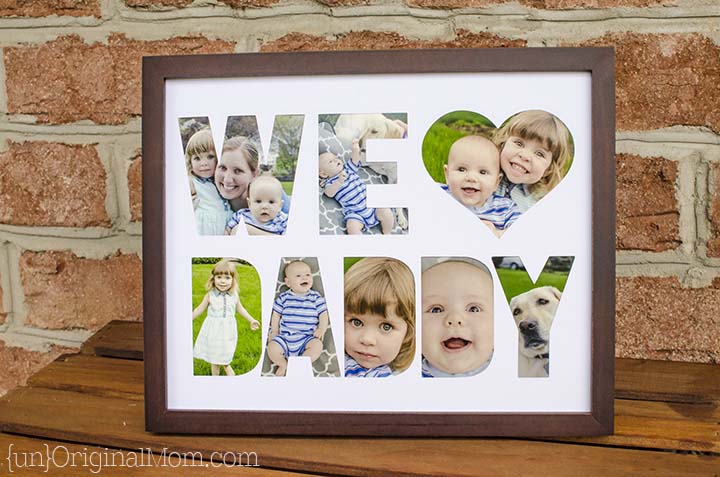
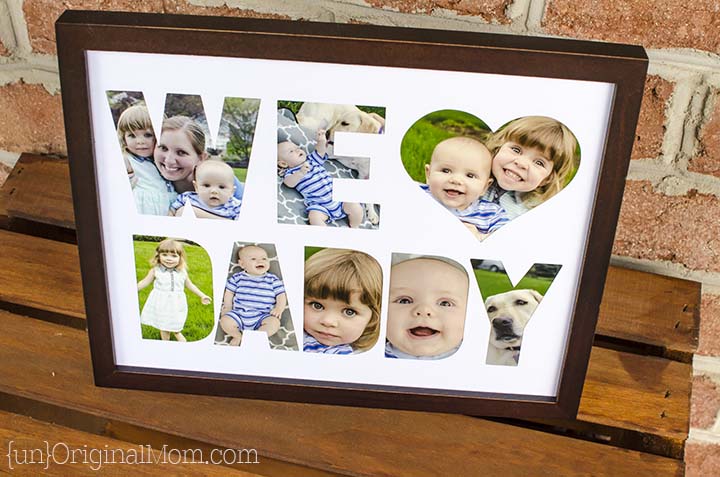
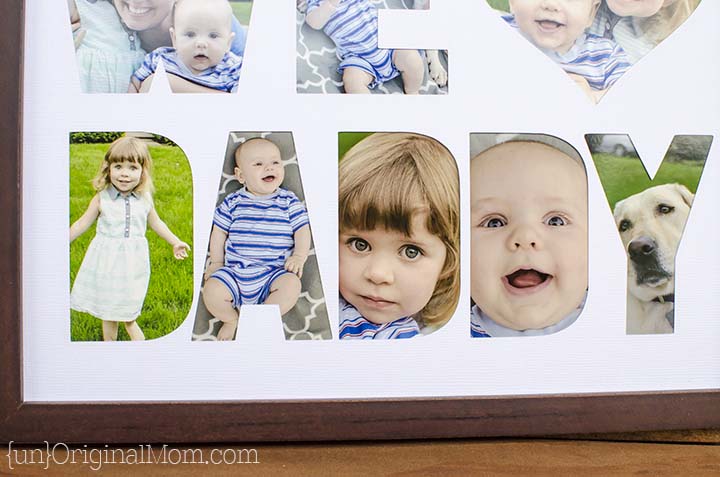
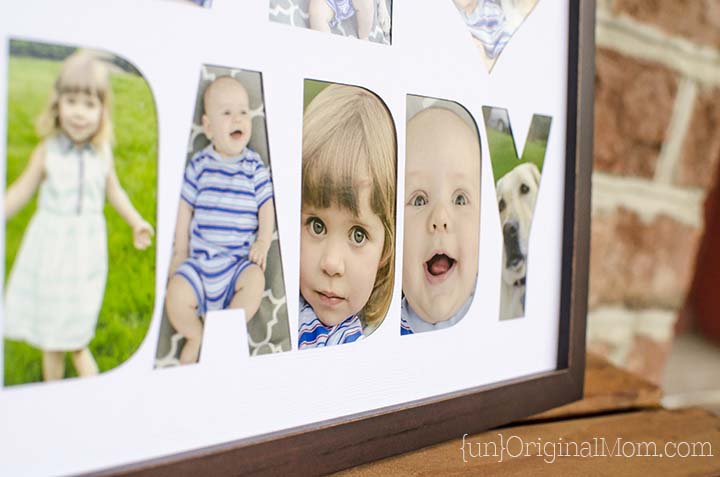
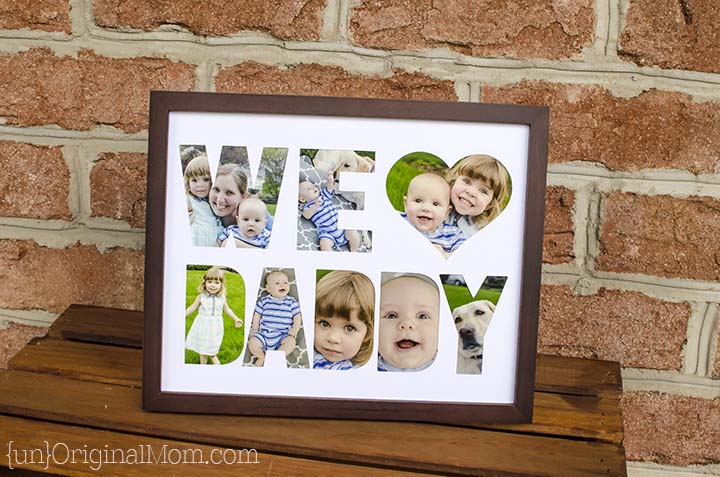
If you're looking for a relatively easy Father's Day gift for your husband or father that they will absolutely love, this project will certainly fit the bill! I actually made it for my husband LAST year and of course I didn't get it finished in time to blog about it (any other "pro-craft-inators" out there? hehe) – but it has gotten LOTS of compliments from his coworkers as they've seen it on the desk in his office, so I decided it was worth digging out to share! (Yes, I had him bring it home so I could take photos of it. #lifeofablogger)
Now, before we jump into the tutorial, you should know that I used my Silhouette Portrait to make this – but you do NOT need a Silhouette machine to make this project! Silhouette Studio – the program you use to design things to send to your Silhouette – is FREE, so you can download it to create the photo letters and just print out your project without cutting a photo mat. It will still have the same effect.
Your two options for this project are as follows: OPTION A – use Silhouette Studio to lay out your photos and then use your Silhouette machine to cut a "We <3 Daddy" photo mat that will lay on top of the photos (this is what I did). OPTION B – use Silhouette Studio to design a "We <3 Daddy" photo collage, with no photo mat. It will look exactly like mine, except just a printed photo without a photo mat. Don't worry if that sounds confusing, I'll walk you through it step by step, I promise!
Ok, first things first. If you don't have Silhouette Studio, go ahead and download it here (the basic version is all you need). Second thing, you'll need the cut file that I created – download it here. (Fine print: this file is for PERSONAL use only. Please do not share it on your blog, via email, etc – send people to this post to get the file themselves. I often share free Silhouette cut files – make sure you're subscribed via email so you don't miss them!) The other thing you need are PHOTOS of your adorable kid! Have the photos you want to use in a folder on your computer, open on your desktop.
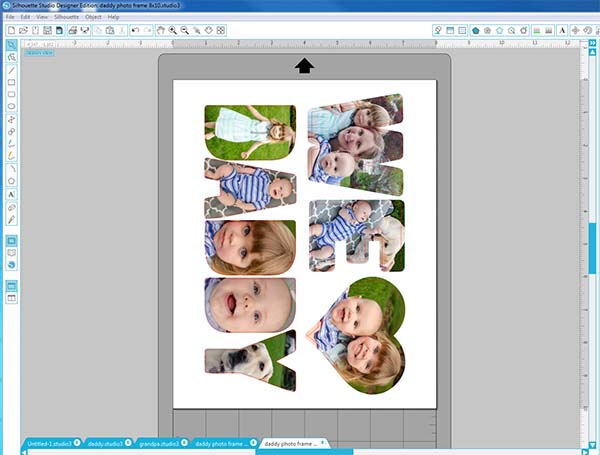
Are you with me so far? Good! Now, open up that cut file. This is what you'll see.OPTION A people (Silhouette users) – the blue lines are where your photos will go, and the red lines are your cut lines for the photo mat. (The blue lines are slightly bigger to allow some bleed around the letter cut-outs – it's a whole lot easier to line up that way.) OPTION B people (non Silhouette users) – go ahead and DELETE all the blue lines. You'll put your photos inside the red lines.
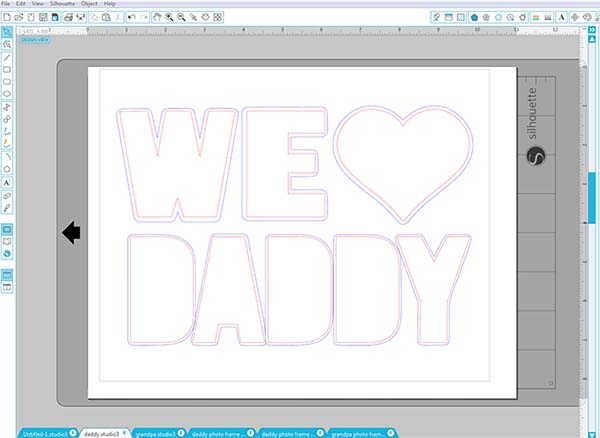
Now, drag and drop a photo into your Silhouette Studio window, being careful NOT to drag it directly onto a letter. (It will merge with the letter but you won't get to decide how to crop it.) Re-size the photo by holding "shift" and dragging the corner in. Right click and select "Send to Back." You'll be able to see the red and blue lines in front of your photo.
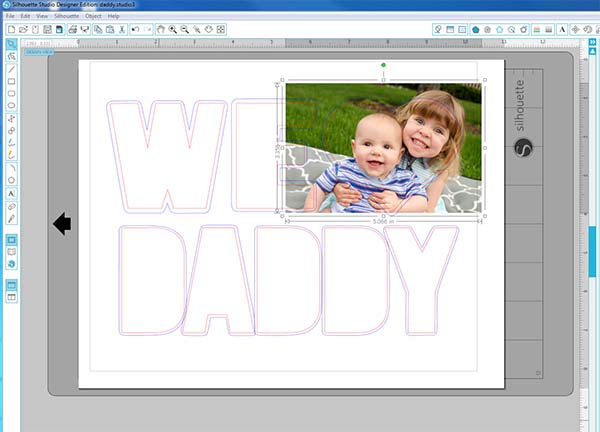
Now drag and re-size your photo until you get it just where you want it. OPTION A people, Remember that the RED lines are what you'll see of the photo through the photo mat (the blue lines are the full bleed), so line up your photo accordingly.
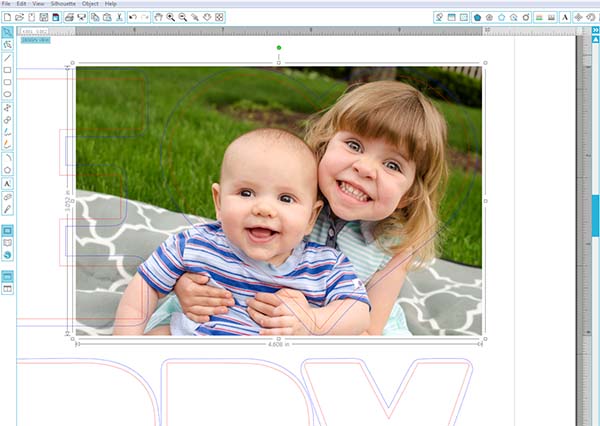
Once you have it where you want it, open the MODIFY window (the 9th icon in from the top left, it's a little gray box and a blue M inside a circle).
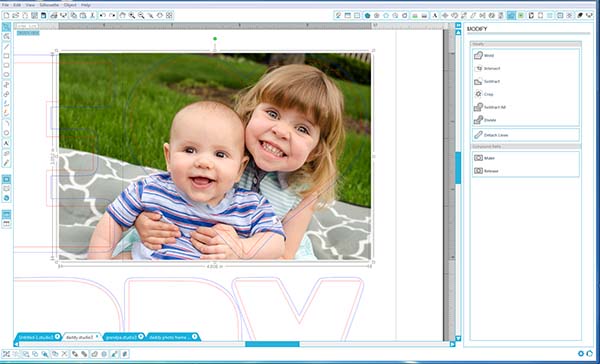
Select your photo, hold shift, and select the BLUE line. (OPTION B people, use the RED line – remember I had you delete the blue lines.) With both the shape and the photo selected, click "CROP in the modify window.
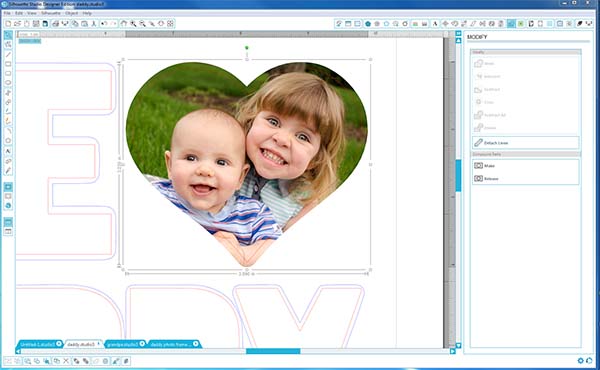
Ta-da! You should now have a letter (or heart) shaped photo! Now, repeat with all your photos and letters!
This cut file is sized to 8×10″, so if you want a different dimension you'll have to adjust your page size accordingly. If you're printing on your home printer, go ahead and print directly from Silhouette Studio. (Silhouette users, since we are not cutting the photo out, there's no need to add registration marks.) Now, if you're printing at a print shop or want an actual printed photo from a photo lab to put in your frame, it's a bit trickier to pull a printable format from Silhouette Studio (you'll want a PDF or a JPEG). Kay from Clever Someday has great tutorial on how to do this on a PC or Mac, so head over there to learn how if you've never done it before. Pay careful attention to making sure you've sized your image correctly and selected the correct orientation – the page size matters! It can't hurt to do a test print from your printer to make sure your photo is actually printing at 8×10.
OPTION B people – you're done! Print your photo collage and frame it. Daddy will absolutely love it!
OPTION A people – we still need to cut your photo mat. Remember, since we're not actually cutting out any photos, there's no need to do a print and cut with registration marks. All you need is to load thick card stock into your machine, select the appropriate cut settings, and CUT the RED LINES. Don't forget to make sure that only the RED lines are set to cut! (That includes the 8×10 rectangle around the edge so you can make sure this is lined up perfectly inside your frame!)

I just used a single piece of linen card stock for my photo mat, but if you'd like a thicker look to your mat you can cut several pieces of card stock and then layer them on top of each other in the frame. That's all there is to it!
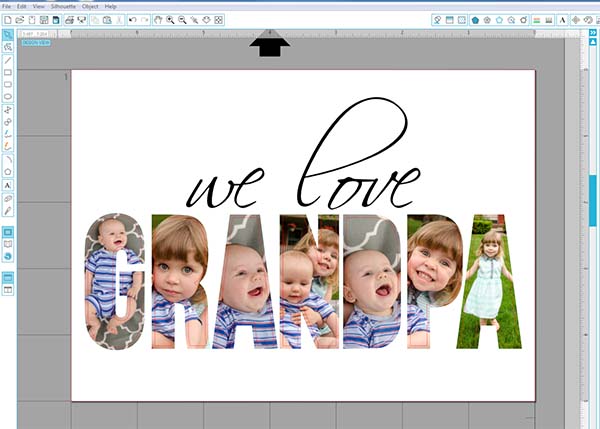
I also made one of these for MY dad! If you'd like the "we love GRANDPA" version, you can download that cut file here. (Fine print: for PERSONAL use only.)
Of course, you could use this technique for ALL kinds of different gifts…for Mommy or Grandma, "Thank You," "Congratulations," even the last name of a new Mr. & Mrs…endless possibilities!
Happy Crafting!


Get your copy of my FREE meal planning binder!

Sign up to get a free copy of my meal planning system - an 11 page printable meal planning binder, complete with a pantry inventory, shopping list, and more to help get on top of your menu each week!
Success! Now check your email to confirm your subscription.
Posted by: screenontop.blogspot.com
Source: https://www.unoriginalmom.com/diy-fathers-day-photo-frame-tutorial/